Absolutely all the text in the product table can be changed or made translation ready based on your requirements.
This includes things like:
- Column headings
- Button labels
- Filter labels
- Sorting dropdown text
- Result count messages
- Floating cart summary
- “No results found” messages
- And much more
You can also fully translate your product tables into other languages and even make them work with multilingual plugins like WPML.
Understanding Where Text Settings Are Located
In general, text settings are found in 2 different places depending on the type of text you want to edit.
1. Table-Specific Text
If the text belongs to a specific table element, you will usually find the setting directly inside that element.
Examples:
- Button text
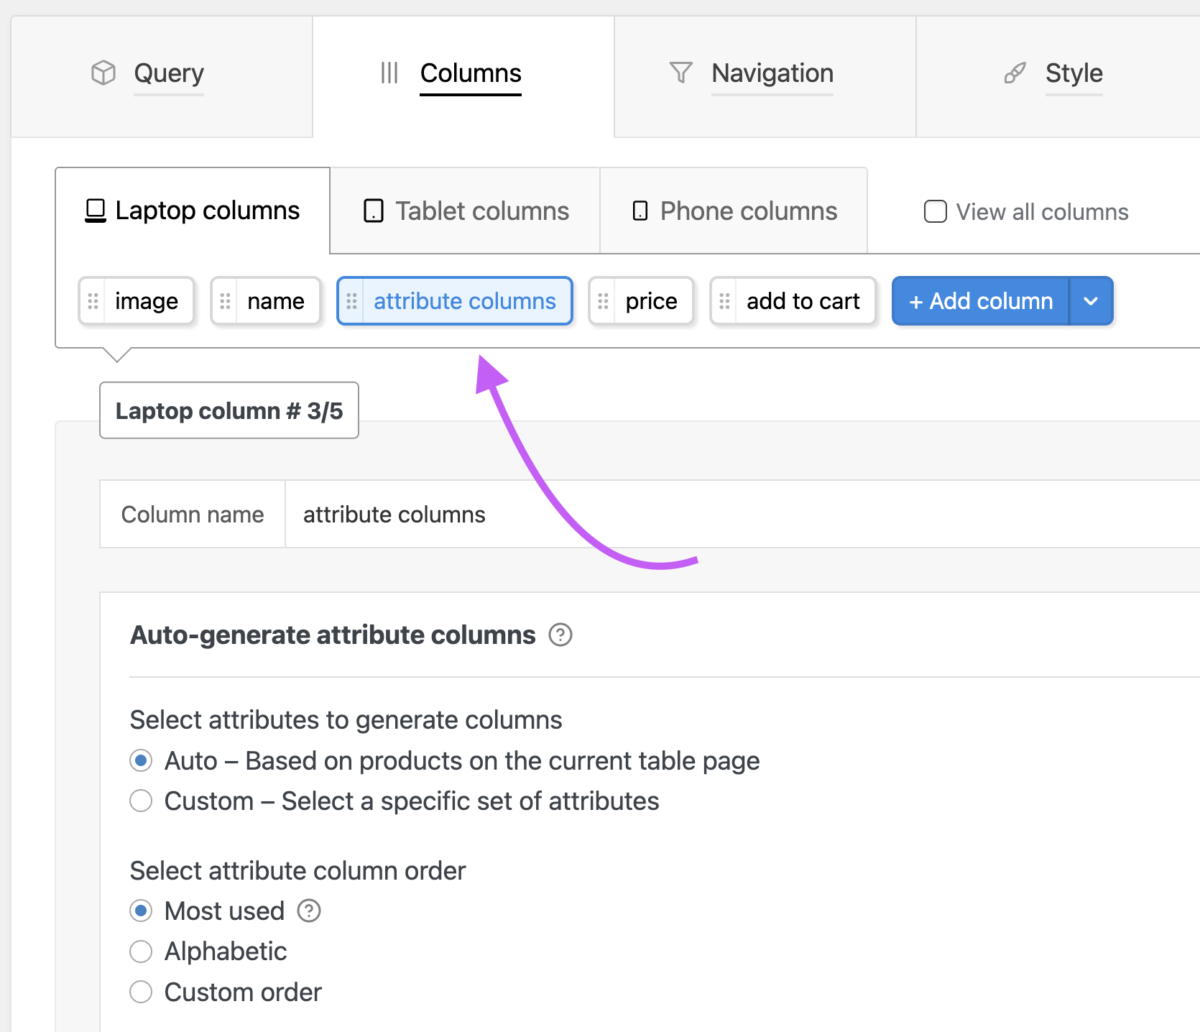
- Column headings
- Sorting labels
- Filter labels
Typical location:
Table's settings → Related element settings
2. Global Plugin Text
Some text is shared globally across all tables. These settings are located in the plugin’s global settings area.
Examples:
- Floating cart summary
- “No results found”
- General plugin messages
Typical location:
WP Admin → Product Tables → Settings
Common Text Customization Examples
Below are some common examples that will help you quickly understand where different text settings are located.
Changing “Sort By” Text & Sorting Labels
The sorting dropdown is part of the table navigation system.
Go to:
Table settings → Navigation tab → Sort By element settings
Here you can:
- Change the “Sort By” label
- Rename sorting options
- Modify dropdown option text
If you specifically want to change the text “Sort By”, please see:
FAQs → Navigation → How do I change ‘Sort By’ text / How do I assign a default ‘Sort By’ option?
Changing Add to Cart Button Text
The button text is controlled from the Button element settings.
Go to:
Table settings → Columns → Button element settings
Then:
- Open the Label section
- Open the Text element
- Change the button text
You can also customize:
- Background colors
- Height
- Styling
- Icons
For more details, see:
FAQs → Styling → How do I change the text, background color and height of the Button element?
Changing Floating Cart Summary Text
The floating cart summary (cart widget) uses global settings.
Go to:
WP Admin → Product Tables → Settings → Cart Widget
From here you can:
- Change the floating summary text
- Modify styling
- Customize appearance
Changing Result Count Messages
Messages like:
- “Showing 1–10 of 30 results”
- “Showing all results”
- Similar result templates
can be customized from the Result Count element.
Go to:
Table settings → Navigation → Result Count element settings
Here you can edit all result message templates.
Changing “No Results Found” Message
This message appears when filters/search lead to zero products.
Go to:
WP Admin → Product Tables → Settings → No Results
Here you can fully customize the “No results found” message.
Translating Product Tables Into Other Languages
This section is divided into 2 parts:
- Translating the table into only one language
- Allowing visitors to switch between multiple languages
1. Translating Tables Into One Language Only
If you simply want your table to appear in another language (for example English → Spanish), then you usually do not need any third-party translation plugin.
Every piece of text in the product table can be manually changed to your preferred language.
Where To Translate Text
Option 1 — Table Element Settings
Open the specific table element and change its label text.
Examples:
- Column headings
- Buttons
- Sorting labels
- Filters
Option 2 — Global Settings
Some shared plugin text is located here:
WP Admin → Product Tables → Settings
Examples:
- Floating cart summary
- “No results found”
- Global interface text
For many websites, this is all that’s needed.
2. Allowing Visitors To Switch Between Languages
If you want customers to switch between multiple languages on the front end, then you should use a multilingual plugin.
WPML Compatibility
WooCommerce Product Table PRO is fully compatible with WPML.
WPML allows you to:
- Translate products
- Translate categories
- Create multilingual pages
- Let visitors switch languages
Recommended WPML Setup Process
Step 1 — Translate Your WooCommerce Store
First use WPML to translate:
- Products
- Categories
- Attributes
- WooCommerce content
Please refer to WPML documentation/support for WPML-specific questions.
Step 2 — Verify Product Translations
Before working on the product table itself, ensure that:
- Product pages display correctly in each language
- WooCommerce content is properly translated
If WooCommerce translations are working correctly, the product table will automatically display translated WooCommerce content as well.
Step 3 — Use One Product Table Only
Do not create separate product tables for each language.
Instead:
- Create a single table
- Reuse the same shortcode on translated pages
The plugin will automatically detect the current page language and display translated content accordingly.
Translating Custom Text Inside Tables
Sometimes you may manually enter text inside the table itself, for example:
- “Title”
- “Sort By”
- “SKU”
- Custom headings
To make such text multilingual, use the special shortcode below.
The [wcpt_translate] Shortcode
Example:
[wcpt_translate default="Text" en_US="English text" fr_FR="French text"]
This shortcode automatically displays different text depending on the current site language.
Example Behavior
| Language | Output |
|---|---|
| Default | Text |
English (en_US) | English text |
French (fr_FR) | French text |
You can use any valid WordPress locale codes.
You can find a complete list of WordPress locale codes here:
Example — Translating A Column Heading
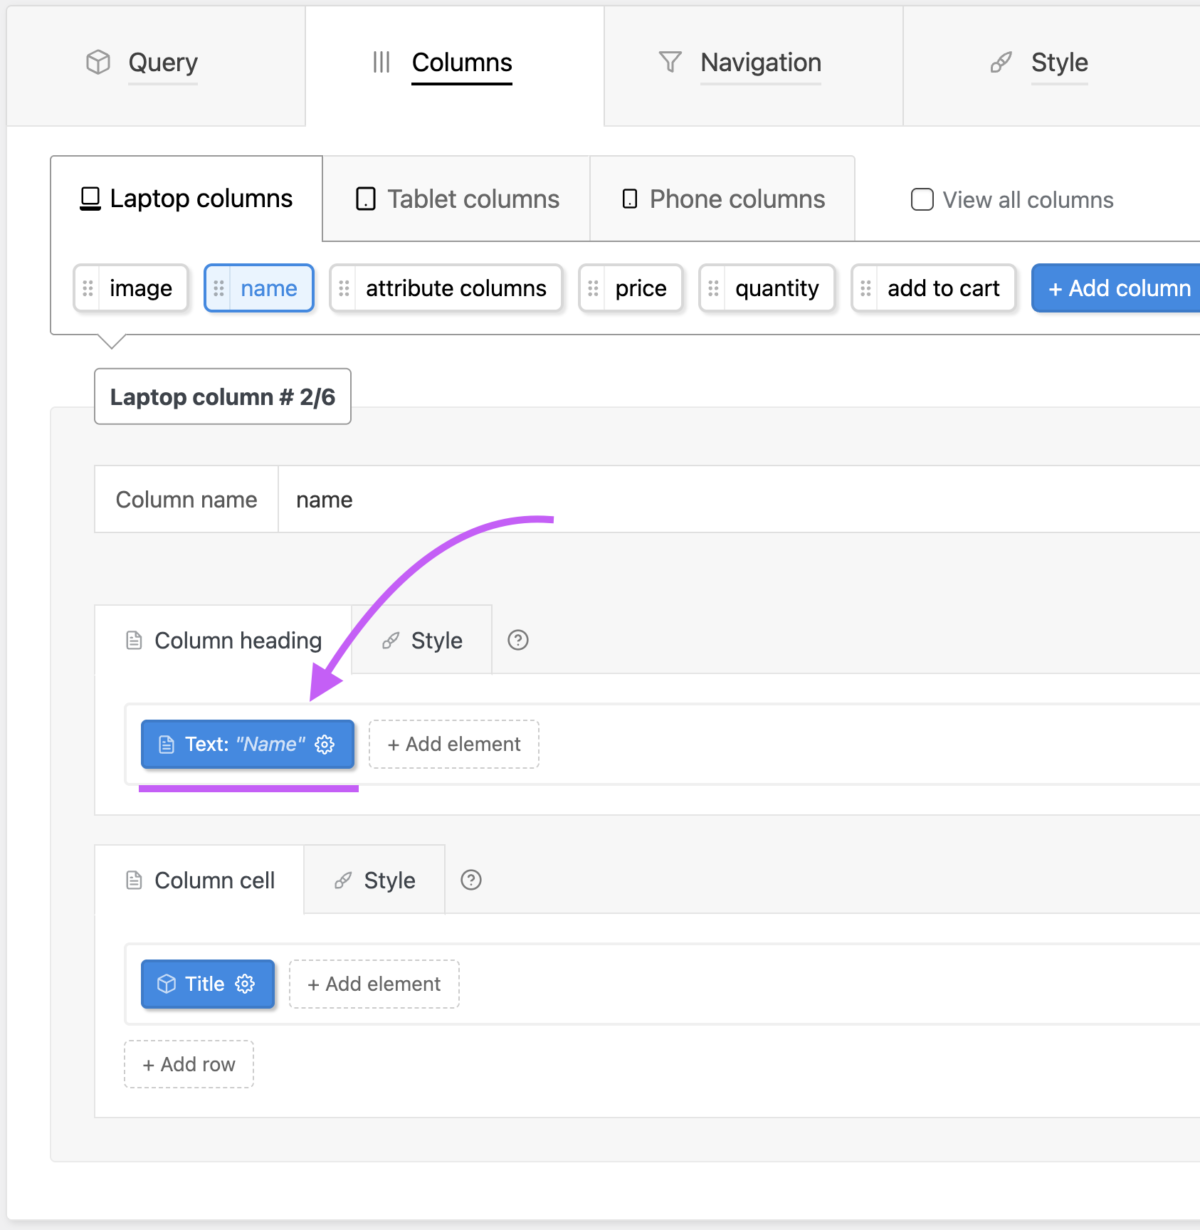
Suppose your column heading currently says:
TitleInstead, replace it with:
[wcpt_translate default="Title" en_US="Title" fr_FR="Titre"]Where To Add This
Go to:
Table settings → Columns → Laptop Columns → Specific column settings → Heading text element
Then replace the original text with the translation shortcode.
Need More Help?
If you need assistance with table text customization or multilingual setup, feel free to contact support: